
Replacing Windows & Hatches

Aluminum-framed window
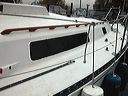
Glued-in window
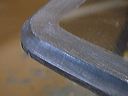
Prepared plexiglass
During the production of the C&C 27, C&C used two basic window types: aluminum-framed plexiglass with a rubber gasket and glued-in plexiglass. The techniques of replacement are different, as are the reasons for wanting to do so, and so they are dealt with separately. Repairing glued-in plexiglass is the more difficult operation, with two broad options:
- Mechanical fastening with screws or through-bolts, no frames. This can be a simple solution or complex, depending on your aims. DIY Boat Owner magazine's author, who works for a major boat repair firm, treats this method with some contempt, regarding it as simple and inexpensive but prone to leaking and essentially not worth the bother. If you must do this, drill holes in the plexiglass oversize and fasten with flat-head screws in finishing (or "cup" washers.
- Mechanical fastening with frames is discussed on this page. Very attractive, but can be costly.
- Gluing with the original material, methacrylate, is discussed on this page while a following page discusses the use of a new material from Sikkens. This material, Sikaflex 295-UV, when used with its associated (and obligatory) cleaner and primer, will glue hatches into alloy frames and windows into fibreglass. These materials seem expensive (about C$50 for one tube of Sikaflex 295-UV with cleaner and primer) but are a bargain compared to existing options. They were used to glue Towser's head windows in April 2006. This seems to have worked well; at the beginning of 2008, both windows are secure. Moreover, the material was used in spring 2007 to repair the forehatch on Kat's Paw I; no problems have shown up despite the boat's hard racing schedule. Based on this success, Kat's Paw I now has one main cabin portlight secured by this material (spring 2008).
Plexiglass or Lexan?
Your replacement material may not be plexiglass, though that is the less expensive choice. Plexiglas is a tradename for a brand of acrylic sheet; most people call this material plexiglass (and it's usually spelled that way) so that's what we'll use here. Lexan is polycarbonate sheet; again the tradename is becoming the generic name.
Your favourite sailing magazine's fear-mongering articles about rogue waves may have convinced you that you need the ultimate in strength, which means Lexan. Lexan is also bullet-proof (important on a sailboat). According to the Lewmar hatch-repair supplier, Select Plastics, as quoted in Sailing and a site FAQ that has now been replaced, Lexan's strength and clarity degrade more quickly than plexiglass', plus plexi has better resistance to scratches and cleaning chemicals. The result is a longer useful life at considerably less cost.
C&C Hatches
With the Mk III, C&C made the move from a fibreglass to an aluminum-framed hatch by Atkins & Hoyle in Toronto. If your hatch leaks around the plexi, they can replace it for you. The cost in 2000 was approximately C$400.00. Their hatch-repair specialist now is in business independently as Hammerhead Nautical Systems, offering complete plus DIY services. In the US, Select Plastics (see above) fixes all makes of hatches; their price is not known.
Aluminum-Framed Plexiglass
This was the C&C (and industry) standard until about 1978-1980; later, the company retooled many of its boats for glued-in plexiglass.
An extruded aluminum frame surrounds the plexiglass; holding the plexi securely in place and providing water-tightness is a rubber gasket (it's not really rubber, but let's call it that for convenience). Plexiglass scratches, breaks down in sunlight, crazes and may turn a milky white, all of which are good reasons to replace the old material with new clear material. Plexiglass is a commodity that is easily available in any large town and most suppliers will cut and finish the material if you provide the original as a template. In Toronto, Plastic World has given good results and is easy to get to; price for the replacement windows in summer 2004 was C$30.00.
The only difficulty most owners face in replacement is finding a source for the rubber gasket, which has probably hardened and cracked in the last 20 or 30 years. South Shore Yachts (see Links for phone number, the best way to contact them) in Niagara-On-The-Lake has C&C-style gasket. Only one gasket style was used, according to South Shore, so you can order the necessary amount before embarking on the job. Price reported by Chefanti owner Tom Parks (see Chefanti in The Fleet) in summer, 2004 was C$130.00 including shipping or US$120.00 shipped to the Chesapeake area.
It is not necessary to remove the aluminum frames to replace the plexiglass (unless you have leaks between the fibreglass and aluminum, in which case you should remove the frames and re-bed them – external caulking will fail in short order).
Chefanti owner Tom Parks reports that the replacement process is exacting but not difficult.
"Removing the old windows was easy. They mostly fell out. It's important to remove all foam rubber inner liner and window gasket, then clean the frame where the foam rubber formerly was, using acetone. Also ensure the channel in the frame is entirely clean of debris.
"I took the windows to Plastic World who did a great job cutting to exact size. They charged $30 for the two main windows, with labour. I chose standard plexiglas; I imagine there are many alternatives, but this worked for me. Replacement foam inner and gasket (also called spline) came from South Shore.
"The actual installation is fairly easy. A couple of tools you will want to have are a rubber mallet and short piece of wood, tapered towards the end. These are used to help seat the gasket. An "X-acto" blade is used to cut the foam and gasket, and a bucket of fairly soapy water helps lubricate the gasket to make it easier to seat in the channel.
"So, use acetone to clean the flat part of the frame where the foam rubber used to be. Sweep the channel at bottom clean, and ensure there are no obstructions in any part of the channel. Cut a piece of foam approximately equal to the perimeter of the opening. Starting at the bottom of the frame install the new foam by peeling the backing off and pressing foam firmly to the frame. Work around the frame until you get to the starting point. Using the X-acto blade, trim the end to ensure a tight seam. Next, take the protective plastic covering off the interior side of the window and peel back about an inch around the outside of the exterior side (or take it off completely, risking some scratching during the install). Fit the window into the frame, ensuring it seats up against the foam and does not drop into the interior channel either at the side or bottom of the frame. The main, exterior gasket fits into the channel and it can make things very difficult if the window also wants to occupy the same space. I used bits of popsicle stick to prevent the window dropping in.
"Cut an approximate length of gasket. The window is going to lie up against the foam, then the gasket goes up against the window and the fat part of the gasket is going to seat in the channel, with the window frame edge going into the cut or small channel in the gasket. Arrange the gasket around the frame so that the ends will be at the bottom. You are going to start installing the gasket at the top part of the frame, working from the middle to the ends. Dip the gasket in the soapy water to make it slippery, then begin to feed it into the channel. Then take your mallet and piece of wood. Place the wood on the gasket and use the mallet to seat the gasket. The corners will take a bit of fiddling to get right, but I managed to do it without the gasket deforming.
"That's basically it. As you work around the frame you'll remove the popsicle sticks, then cut the ends of the gasket to make as close a fit as you can. Remove any plastic covering you may have left on, clean the window, and you are done. Finally, you will have to make curtains for the windows because people can now see in."
If you have to cut the material to shape yourself, do not remove the protective paper until the cutting is done. Trace your old window onto the protective paper, then cut with a fine-toothed metal-cutting blade in the best jigsaw you can beg or borrow. You want a vibration-free saw so the plexi won't be damaged and you want a variable-speed machine so you can slow the blade down to the point where the blade cuts rather than melts its way through the plastic. When the window is cut, sand out any roughness in the edges with 80-grit then 100-grit sandpaper. Also, bevel the edges slightly as cracks can propagate from a sharp edge.
Other notes:
- Be extremely careful with acetone. It dissolves and/or crazes many plastics, and is particularly destructive of plexiglass. It's also highly flammable. Varsol or paint thinner will work almost as well as a cleaning agent.
- Try to compress rather than stretch the gasket as you put it in; as it ages, the material contracts slightly, so a gasket that has been stretched may pull out of the frame at the corners.
- Most flexible plastics become much softer and easier to mould into frames if you put them in a pail of really hot water until you're ready to work with them.
"Don't go another season with those milky white, opaque windows – it's an easy job to replace them," says Zia owner Joe Boyle.
Glued-In Plexiglass
The principal reason for replacing glued-in windows is that they have become unglued, either to the extent that they leak or that they are falling out.
Not very many people do an original-style replacement. The reasons are the cost of having it done by a yard (a Toronto area supplier charges $1,000 a side) and the seeming impossibility of doing it yourself.
Faced with these barriers, most people have worked around them. One response is to remove the windows and reinstall them with screws and polysulfide or 3M 5200. Another response is to cover their edges with wood or metal; wood seldom suits the late-C&C style while the result in metal depends very much on the skill and dollars applied to the task. The third page of this section deals with some successful efforts.
The barriers to doing it yourself are 1) the lack of information and 2) the $250 price tag of the required tool, but 1) here’s the information and 2) you can rent the tool from South Shore Yachts (see Links) and the tool's cost can be shared or reduced by selling it when done. Alternatively, you can use the Sikkens product discussed above and on this page. Replacing glued-in plexi is a time-consuming task that requires quite a bit of labour and organization but that gives good-as-new results if done carefully.
The first job is getting the old plexi out. This is not difficult if the windows are already loose (which is probably why you embarked on this foolishness anyway). From inside the boat, slip a butter knife between the plexi and the gelcoat in the loose area. Run the knife around the window; this will scratch the old plexi but since you’re going to replace it, the scratches don’t matter. This task is very much easier when it's cold; pop the windows out, then duct-tape them back on until it's warm enough to make the replacement.
The material is thick (because these windows formed part of the boat’s structure). You will probably find that the old material has a small bevel on the outside and a large one inside. The finish on the cut and beveled edge is very smooth, probably to obviate the possibility of a crack propagating from a nick or sharp edge when the material comes under load.
As with aluminum-framed windows, the old window is your template for the new. Plexi degrades in sunlight, so gluing the old stuff back in for another 20 years is false economy. A plastics supply house may be your best bet for getting the fit and finish described above. An industrial plastics supplier, Ontario Plastic Fabricators made perfect copies of Towser’s originals (bevels and all) for about C$100 (the difference between the price paid for Chefanti and for Towser is explained by the greater thickness of the plexi used for glued-in windows and the extra work required to bevel them).
When the old windows come off, they will leave behind lumps of old glue along with some pits in the gelcoat in the window mounting area. Clean off the old glue as thoroughly and carefully as you can, down to gelcoat. A Dremel Moto-tool does a good job but makes a colossal mess, so tape some plastic to the inside of the opening. Do a thorough cleaning and the windows will fit perfectly evenly and flush; leave a lumpy surface and your windows will be waterproof but not flush-fitting.
Now comes the tricky bit, in two parts.
Tricky bit part one is to find a supply of an adhesive called methacrylate; one type is made by ITW Plexus. This material is about C$60 a tube and can only be dispensed with the previously mentioned C$250 tool (expensive, yes, but get over it – if you had a really expensive diversion like flying, you'd have to have the whole thing x-rayed when you finished).
Tricky bit part two is that using methacrylate is a fire-drill. It is a two-part mixture that combines in the applicator and hardens in 5 minutes, after which you can only remove it with a chisel, a grinder or a blowtorch (no kidding). Accordingly, you have to prepare very carefully with test-fitted, scrupulously de-greased windows and a big stack of damp rags. To hold the window while the methacrylate completes its cure, cut four or five lengths of softwood to wedge between the plexiglass and the toerail; these will brace the plexi while the methacrylate finishes curing. Fill grocery bags with three to five pounds of sand. You will balance these on top of the lengths of wood to increase the holding force of your wood braces. Now test-fit the entire arrangement and make sure everything goes together quickly and easily – 5 minutes go by with astonishing speed. You will not have time to fiddle about or run around looking for more braces or sandbags.
Do the windows one at a time. Put the gorp on the frame, place the window and then one of you must hold it while the other runs around madly wiping up the excess on the outside. Your saving grace is that methacrylate is water-soluble at this point, so compared to wiping up 3M 5200, it's a breeze. Once that's done, you quickly wedge the window in place with your softwood braces and place the sandbags. Now dash down below and wipe up the the excess on the inside. Take a breather (you'll need it). Do another window.
A nice little bonus is that you know almost immediately if you've done a good job (apparently this is why pilots are relatively happy people – at the end of every day, they know whether they have done a good job). Half an hour later, the sandbags come off and if you followed instructions, you've got windows as good or better than what came out of the factory.
It's an incredible panic to do, but when the light comes streaming down below and when you can actually sit under a window in a rainstorm, it suddenly seems worth while.